How to Read a Sewing Pattern Envelope: Get All the Info for Successful Sewing
Start your sewing project off on the right foot! Knowing how to read a pattern envelope ensures you get the right amount of fabric and the correct notions and helps develop a plan of action before you start cutting. Commercial pattern envelopes provide the same information, so once you know how to read one, you’ll be able to read them all!
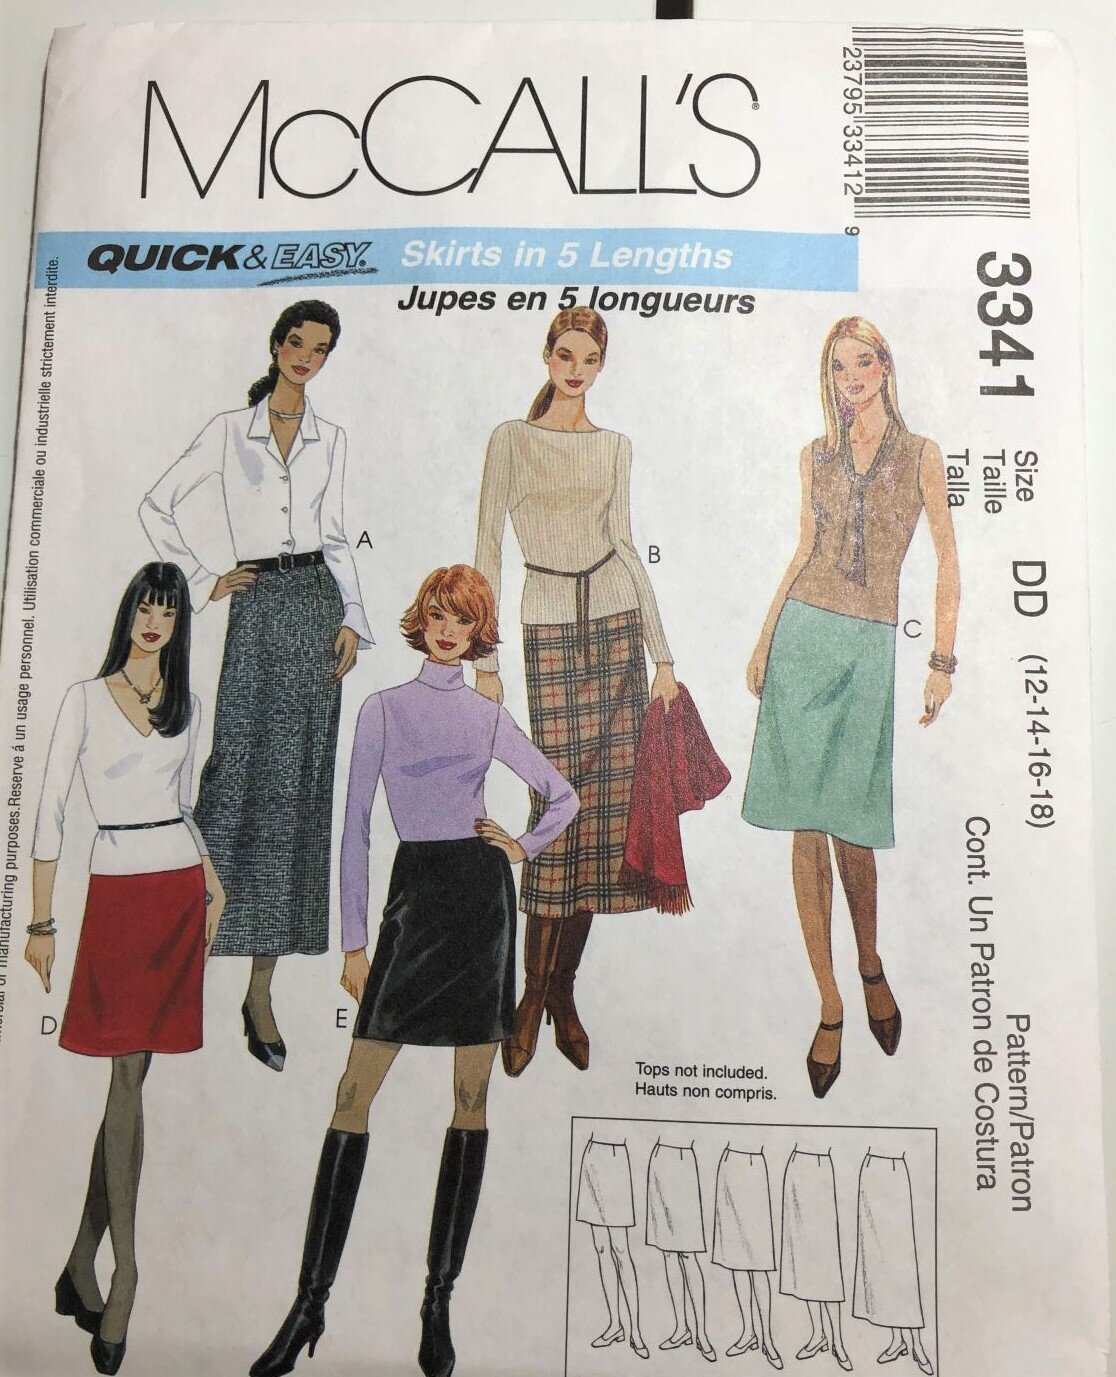
Pattern Envelope (Front):
The front of the pattern envelope always contains illustrations or photos of the finished garment, as well as the different variations included in the pattern envelope.
The size range is also shown; this envelope contains sizes 12-18. Some patterns, will also include a flat drawing of each of the pattern variations, as shown here, though these drawings are usually on the back of the pattern envelope.

Pattern Envelope (Back):
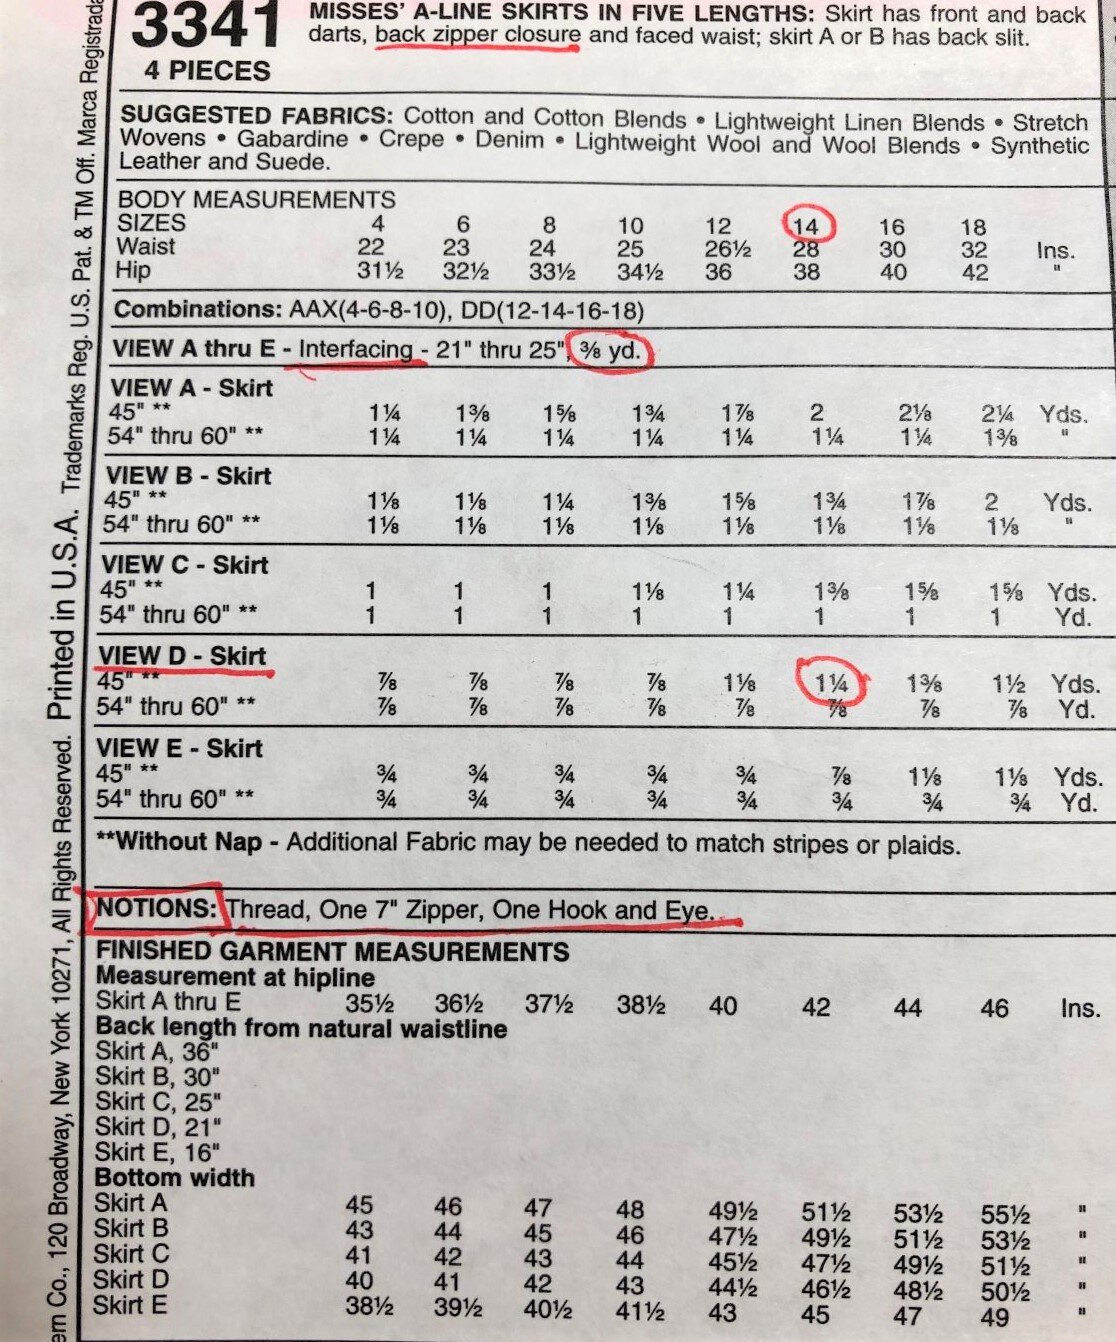
The back of the pattern envelope contains the bulk of the information, in English and French.
Included is a description of the garment, suggested fabrics, body measurements, the amount of fabric required, notions, and finished garment measurements.
Let’s go through each section in greater detail.
As you can see, I like to write on my pattern envelopes.
I take the time to read over everything before starting and circle my size, the amount of fabric needed, as well as any interfacing and notions required.
This saves time and prevents errors when I go to the fabric store. And it helps me remember to get everything in one trip!
Pattern Description:
This pattern makes an A-line skirt in five different lengths. An A-line skirt is fitted at the waist with darts, then flares out across the hips, making a bell shape. This style is flattering to most body types. A waist facing provides structure to the top of the skirt and provides a smooth fit around waistline.
Suggested Fabrics:
While this list is not exclusive, it is a recommendation for the best fabrics to use for this design. Softer fabrics, like crepe, will result in a flowing skirt, while denim and leather will produce a stiff skirt better suited for one of the shorter variations.
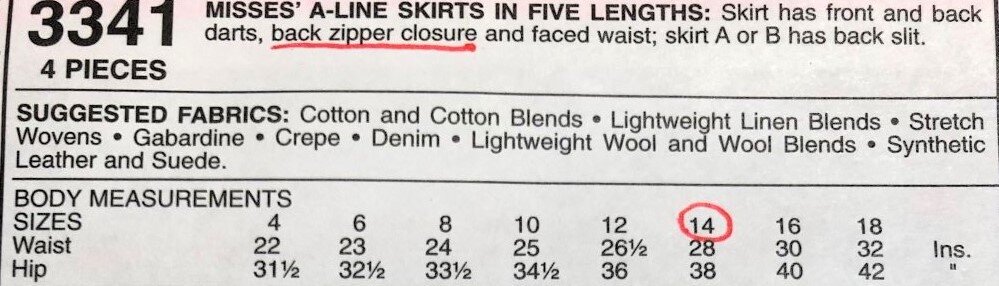
Body Measurements:
Don’t stress about number difference between your pattern size and your ready-to-wear, off the rack size. Back in the day, pattern companies agreed to set measurements for sizes and they have never been updated.
I have a vintage 1968 McCall’s pattern, size 14, with a waist measurement of 27 inches and hip measurement of 38. Compare those numbers with the 2007 McCall’s pattern shown here, where a size 14 waist is 28 inches and hip is 38 inches. That’s a minuscule size change in almost 40 years!
Pattern size is just a random number and it’s better to just ignore it and buy your pattern in the correct measurements to fit your body. I have been a size 8 in regular clothes since I started sewing back in the 90’s, but my measurements have always corresponded to a pattern size 14.
On the plus side, modern patterns include of multiple sizes in the same envelope. Back in the day, you had to buy each size separately. Nowadays if your size is between patterns, say your waist is 28 inches (size 14) but your hips are 40 inches (size 16), you can ease the difference between the two sizes by cutting the waist in a 14 and the hips in a 16 to have a well-fitting skirt.

Fabric Yardage Requirements:
This section of the pattern envelope lists out the amount of fabric required for each size, in each skirt variation. 45 inches is the width of the fabric (between the selvages) when unfolded. Fabric also comes in a width of 54 to 60 inches. The width of your fabric will determine the layout of the individual pattern pieces and how much total length needed to make the garment. Wider fabrics mean less total length.
Nap:
Next to the numbers for fabric width are stars (**) which indicate the required fabric yardage is listed without nap, which brings up the question, what is nap?
Nap means the pile (think texture) of the fabric caused by the addition of extra yarns in the weaving process. The additional yearns create a texture in the fabric which involves direction, perhaps best illustrated with velvet. When you rub velvet in one direction, it’s smooth to the touch and lies flat in the same direction. But if you rub velvet in the other direction it feels rough.
When you cut a pattern in velvet all of the pattern pieces have to line up to the nap is in the same direction. This also applies to other fabrics like corduroy, terrycloth, and suede. Commercial patterns also use to term nap in instances where the fabric has stripes, plaid, or an obvious directional print.
If you are using a fabric with nap, you will need additional yardage. I recommend adding buying an additional quarter to half yard depending on the type of fabric you are using.
Interfacing:
You need interfacing to reinforce the waist facing. I always forget to buy interfacing, so I have a stash of various weights on hand when I need it. Interfacing is usually grouped together in fabric stores and comes in a wide variety of weights and sizes. Interfacing comes in fusible and sew-in.
When I was in college one of my professors told us to always buy sew-in interfacing because fusible “couldn’t be trusted” to lay correctly or stay in place. When I took private sewing lessons, my teacher taught me otherwise. To get fusible interfacing to properly stick to facings, you need to use a lot of steam and you need the let the fabric and interfacing cool before moving it. Interfacing comes with instructions and I recommend reviewing them prior to using interfacing for the first time.
You should be sure to buy interfacing appropriate for the weight of the fabric you are using. Go ahead, feel each of the varieties of interfacing and compare to your fabric; you want to buy the one that feels similar to your fabric. Softer fabrics need softer interfacing. There are lots of different weights to suit your needs including interfacing for knits and black interfacing for dark fabrics. Take the time to find the one that best suits your project.

Notions:
Notions are the additional items that you will need to complete your garment. To make this skirt, you need thread, a 7 inch zipper, and a hook and eye. If you can’t find a matching zipper in the length you need, you can always buy a longer one and shorten it.

Finished Garment Measurements:
Towards the end of the pattern envelope there are measurements of each finished garment for each size in each pattern variation. These measurements are important for two reasons.
First, the measurement will let you know the amount of ease, looseness around the body, in the finished design. A size 14 will have an additional 4 inches of movement around the hip line.
Second, the measurements will let you know the final length of the garment. As you can see, the finished skirts are all the same length, regardless of size. Depending on your proportions, you may want to add or subtract length from your pattern before cutting the fabric to get the skirt length you want. If you are adding length, remember to get extra fabric before cutting out your pattern.
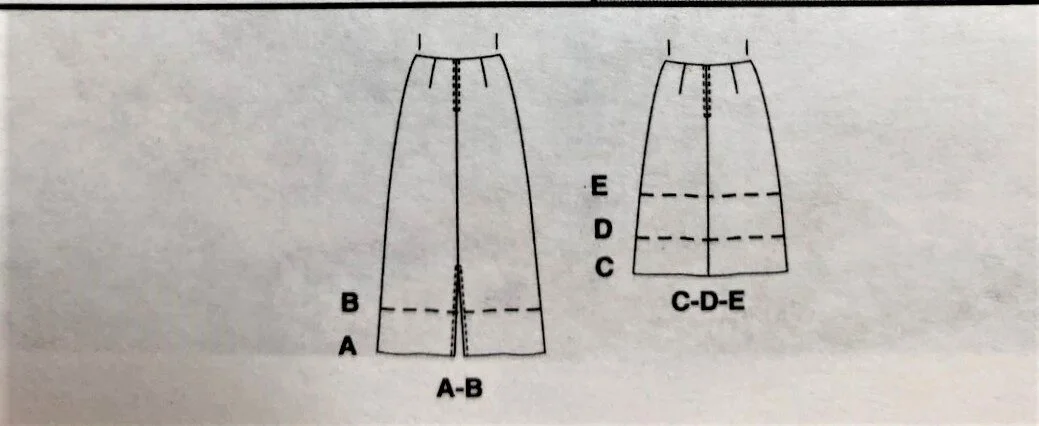
Flat Drawings:
Flat drawings of the finished garment with the individual pattern variations are included on the pattern envelope. These line drawings show the various lengths, as well as dart and zipper locations.
Sewing requires planning and reading the pattern envelope is the best place to start. Once you know your size and the design you are making, buying the correct amount of fabric and notions will be a snap! Take the time and you will be rewarded with a well made garment.

Hi, I’m Toni. I teach creative gals how to sew—no experience needed!
Start Here, Learn to Sew!